If you are planning to apply for an Uzbekistan visa, one thing you should know is that it may come as a dreadful process. It took me a good three hours and some baby tears at the edge of my eyes to finally get it right.
After hitting a plateau from the faulty process, many people entirely give up the thought of visiting Uzbekistan. It takes so much time, but I am glad I and gave myself more time to figure everything out because the country is so worth it!
Uzbekistan eVisa: How Many Days to Get?
There are many countries that can enter Uzbekistan visa-free or by using an electronic tourist visa (e-visa) to travel around Uzbekistan.
As a Philippine passport holder, I needed to apply for the e-visa and I did so while I was in Ulaanbaatar, Mongolia. I received my 30-day visa three business days after application.
Process: Getting Uzbekistan Visa Online
Here is a simple breakdown of my application process while applying for my Uzbekistan visa online.
Step 1: Use the Official Website
I went to the official website which I will link here. Be careful and use only this link because some websites might be fake.
Step 2: e-Visa Application Tab
This is what the dashboard should look like. Right off the bat, you can see it’s quite outdated but it’s the real one. I clicked on the “Application for e-visa” tab first. I used the other tab to check my application later on.
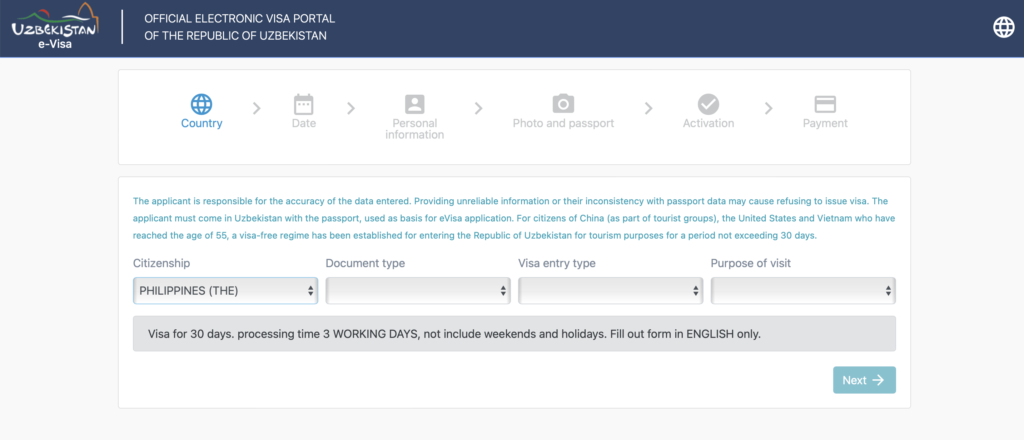
Step 3: Home Country
I selected my home country, the Philippines, in the citizenship tab (select the country of the passport you’ll use to enter Uzbekistan if you have multiple). The website has automatically shown the length of stay that is allowed for my passport when I use the electronic visa which is 30 days.
Step 4: Visa Entry Type
This is where I made a minor mistake. Apparently, I can choose among Single, Double, or Multiple entries at different prices. My frugal brain wanted to save some money and went for Single Entry at $20 since I did not plan on going anywhere anyway.
However, it turns out that Uzbekistan shares borders with five other countries namely Kazakhstan, Kyrgyzstan, Tajikistan, Turkmenistan, and Afghanistan. I could have at least visited Dushanbe, the capital of Tajikistan, while I was in Samarkand, and went back.
Well, lesson learned. If you’re planning for your Central Asia trip, shelling out $15 for a double entry does not hurt.
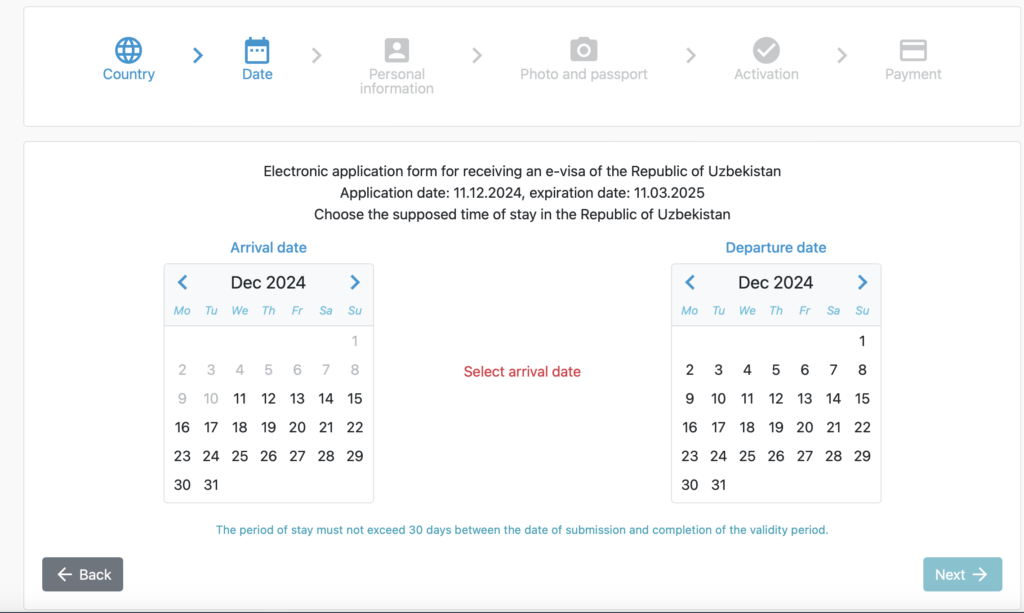
Step 5: Visa Validity
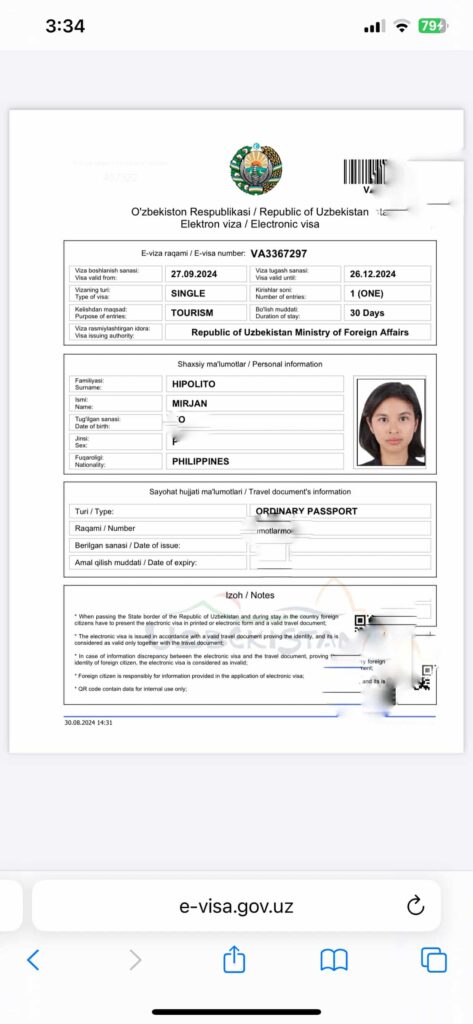
The Uzbekistan e-visa is valid for three months after the intended arrival date. For example, in my case, I applied in August but my intended arrival date (as you can see in the photo of my e-visa above) is September 27, 2024.
The e-visa can be used until December 26, 2024, just in case I changed my mind. This means that the e-visa has a three-month validity but the length of stay is still 30 days. Don’t get confused.
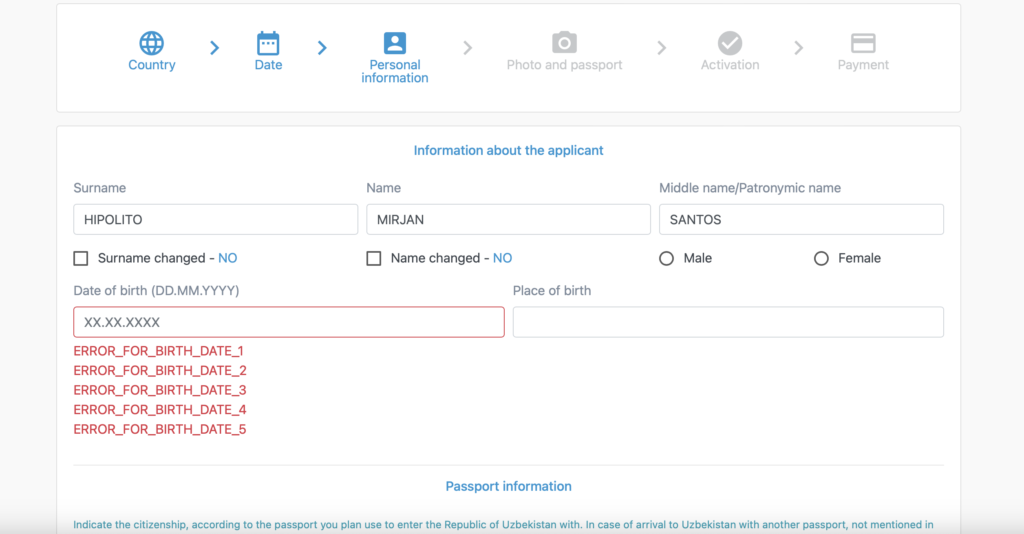
Step 6: Personal Information
I just provided my personal information. There’s a section that asks for the address of your residence in Uzbekistan, simply provide the name of your hotel/hostel.
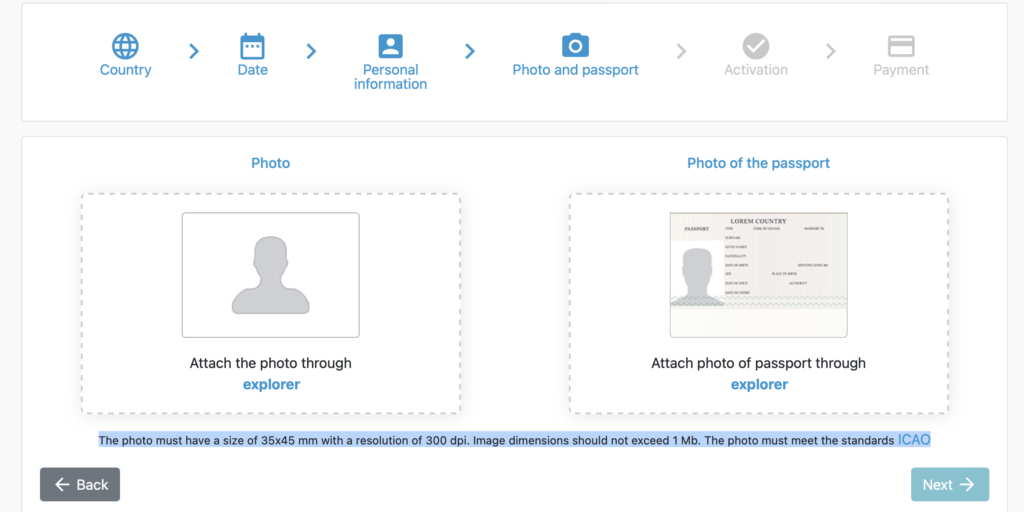
Step 7: Tricky eVisa Photo Requirements
Now, THIS IS WHERE IT GOT VERY TRICKY. I spent three hours of my life trying to figure out how to get around the “dreaded” visa photo requirement.
Let’s break the instructions into bite sizes:
- The photo must have a size of 35×45 mm with a resolution of 300 dpi
- Image dimensions should not exceed 1 Mb
- The photo must meet the standards ICAO
How to Get the Uzbekistan Visa Photo Right?
One important thing I should have realized sooner in the application is that getting the dimensions right solves half of the problem.
I used different apps but none of them got it quite right. But just as I was about to cross Uzbekistan off my Central Asia wishlist and give up my dreams of running around Samarkand’s Registan Square wearing my beautiful traditional dress, I came across this Reddit post and this blog which helped. so. much.
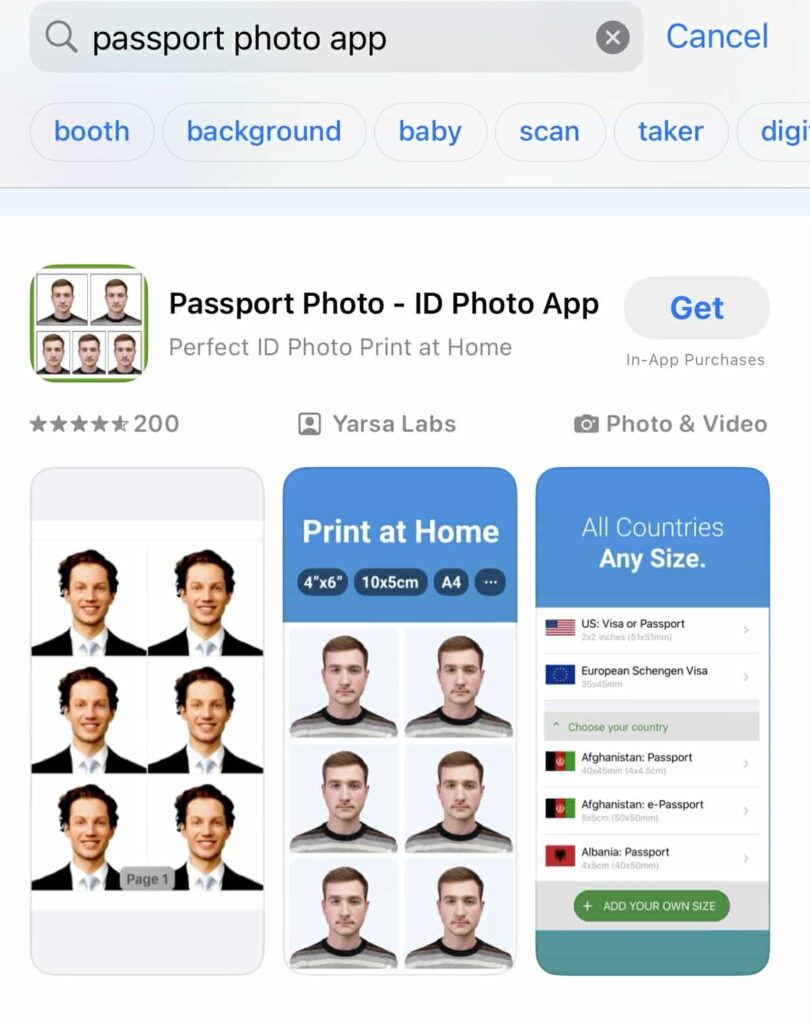
Passport Photo App
Apparently, you have to download an app called “Passport Photo App” that will tailor the image size for you according to countries’ requirements within seconds. The app above is the exact one I used and I downloaded it from the App Store for free.
I selected “Uzbekistan” as the country and the app had automatically resized the photo in accordance with the Uzbek government’s standards.
Getting the Right Resolution and Compress
I thought the challenge ended there but boy was I totally wrong. We still have to meet the resolution requirements and compress the image to get the most perfect version that the website would accept.
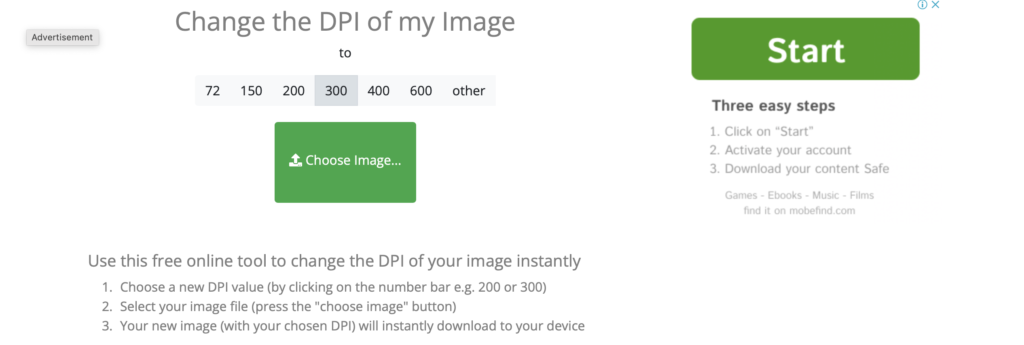
As recommended by the Reddit post, I used Convert Town to meet the 300 DPI requirement. This is another free app, although you might need to watch some ads before the image will be ready for download.
Lastly, I used TinyPNG to compress the image to 1MB. I processed the image twice or thrice to get the right formula.
eVisa Success: After 20 Attempts
In total, I maybe had to save the image in different formats for 20 times before I finally got it (as seen from my “about to get it” screenshot).
I still remember the exact moment that the website finally accepted the image! I felt a huge sense of relief after three hours of sitting in a cafe trying to figure out where I went wrong.
Settle Payment and Done
I settled the payment using my Mastercard and the website notified me that my application had been submitted for review. Prior to this, they sent me a link which comes with this code that I’ll use to check my application’s status on the e-visa website.
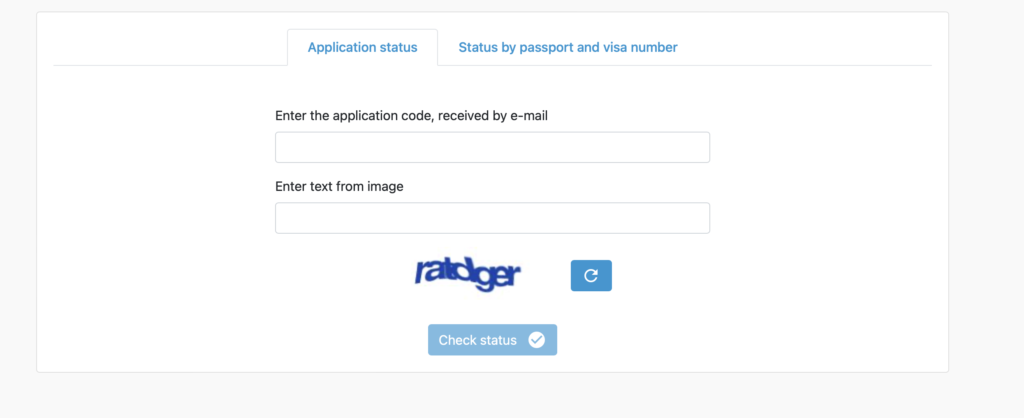
Check the Application Status
After three business days, I went back to the e-visa website to check the status of my application. I went to the “Application Status” tab, typed the code they sent on my email, and voila! My Uzbekistan e-visa is ready.
I simply showed the screenshot of my e-visa when I traveled by bus from Bishkek to Tashkent via a border in Kazakhstan two months later (got held by the immigration officer for two hours but that’s for another story~!)
Final Thoughts
Uzbekistan’s e-visa might be quite a challenge but one thing I’ll say: this country is worth the visa trouble. I had an amazing two-week stay in Uzbekistan and would be willing to go through all of this if it means I can visit it again. I hope this blog will help you navigate this a bit better.






Pingback: Kyrgyzstan eVisa: Guide for Filipinos in 2025